For What It's Worth
It isn't a working garage until you have at least 3 air
connections.
Last year my wife bought me a 60 gallon IR air compressor. To replace that old 20 gallon portable. It was great, but my lines were still a problem. Just one big long air hose. Also the old 1/4" regulator was not flowing for what I wanted. My air tools worked top notch for about 1/2 second. It was time to plumb the garage for air.
Copper is great, but has become more expensive. Steel pipe cheaper, but you need something to cut and thread it. PVC is not a good idea, not rated for air lines and it failure mode is close to a grenade. I looked for something else.
I found various systems that were nylon or plastic rated for air. I finally settled on the Rapid Air Maxline M7500 kit. 3/4" is probably overkill in the garage, but I wont have to worry. Buying the kit, on sale, made it all a lot cheaper. 175 psi max, but 140 psi at 140 degrees F. I will keep it below 125 psi.
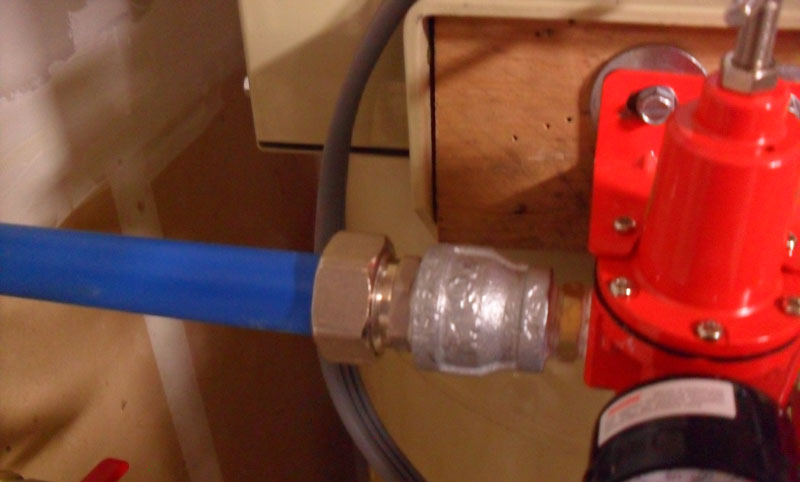
I added 1/2" pipe to my compressor outlet, a filter and pressure regulator. Then connect to the new airline and away we go. Did it all on a Saturday. Planning was done to keep trips to the store to a minimum.
The kit does not come with 90 deg. joints. 90 deg. joints you buy extra. You can make a radius with the tubing, but no less than a 9" radius. I used 3 90s for my layout, personal preference. I had pre-planned the layout and ordered the extra 90s with the kit.
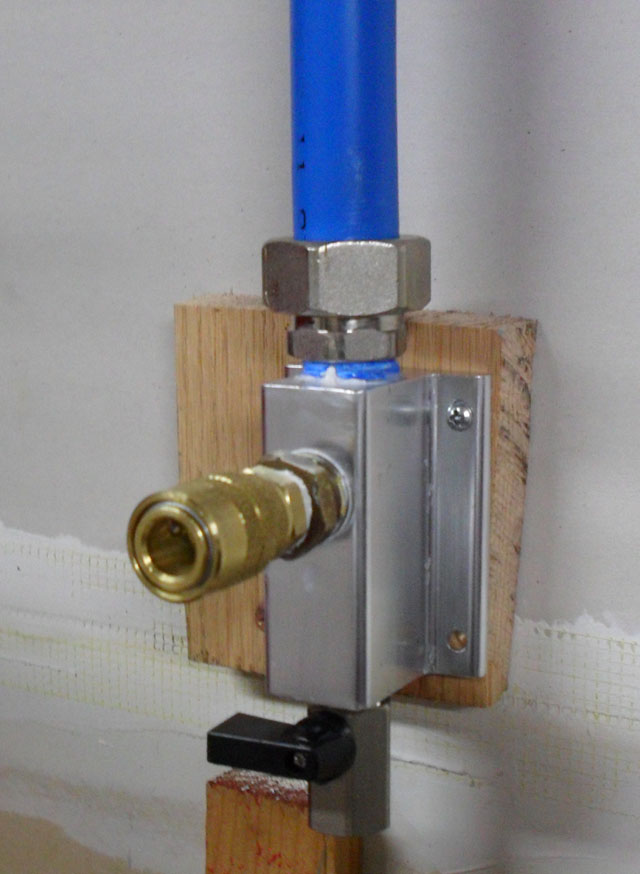
The junction blocks come with 2 3/4 NPT holes. For connecting the air line. One in back and one on the top. They also provide a plug for the one you don't use. On back for thru-wall or hidden installations. On the bottom is s 3/8" NPT hole that the drain valve screws into. Follows good air system planning to have the drain valves. On the front is a 1/2" NPT hole. This is where you connect whatever you want.
I built up the aluminum blocks and bolted them to the wall. Use screws in case you need to take them off when servicing or fixing a leak. An electric screwdriver is a great invention.
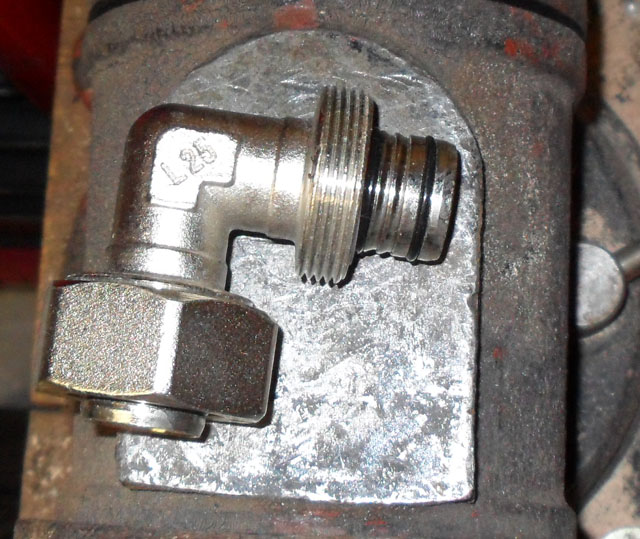
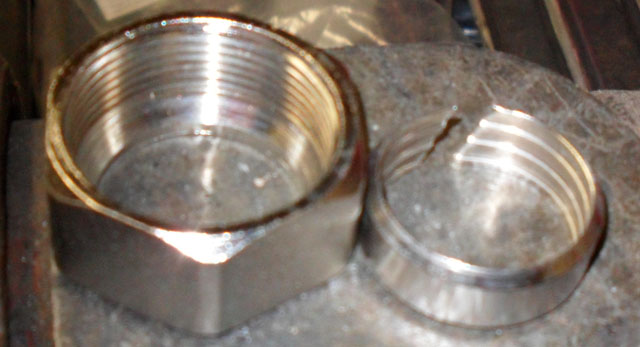
The only real problem I had with the connections was the airline adapter that screws into the junction block. All 3 leaked initially at the pipe thread, slowly of course, but leaked. I got 2 of them stopped, but the 3rd still leaks a little. They did not turn freely and tighten like normal pipe joints, they were hard from the start. I used pipe sealer and Teflon tape in the end. How hard did I tighten it. I am big, a lot of weight into it. Much more and something would break. I have a shut off at the compressor so it is not a major problem. Maybe when it is 65 degrees warmer in the summer I will tighten a little more when the aluminum expands a few microns.
When using pipe sealer, only put it on the male threads and start about 2 threads from the end. Don't get any inside. You don't want it in the airstream. could gunk up a tool or paint job.
I also used wood blocks to hold the clamps in some places. I had some spare oak, so I used it. Note pre-drill oak or you will break your screws. The wood blocks give a good anchor for plugging in air lines. Example of the clamps. Blue air line, gray my electrical line.
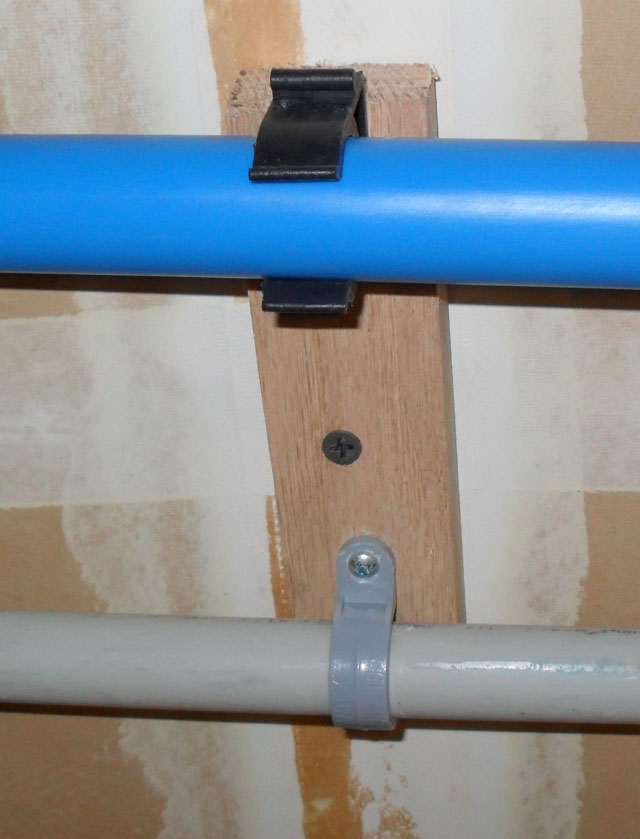
The clamps look like they were made to work with a cover piece, but they only supplied the base clamp.
A cutter is provided for cutting the air line. It works OK, just be careful when cutting the ends to make sure they are square. If you are not careful it can cut at an angle.
A tool is also provided to cut a chamfer and square up the ends for assembly. Works good for chamfering, not so good at squaring up, so cut square to begin with.
The air line connection is 2 O-rings and a compression clamp. Instructions say 1 turn on the compression clamp after snugging by hand.. I never got much more than 1/2-3/4 of a turn. Maybe I can snug tighter than most. I had no problems with these connections sealing. A little water on the inside of the line when pushing together may help. This shows the inside of the connection
The compression assembly that goes on the air line. The compression nuts fit snug around the line. It may take a little work getting them on.
This block is by the garage door with a pressure regulator of its own. Great for tires etc.
It was a matter of measure, cut, prep the line and assemble.
The air line has 3 layers. The inner layer is white plastic, a thin middle layer of aluminum and an outer blue layer. The hardest part of the installation was straightening out the line. Just be patient and having a second set of hands is helpful.
I used about 50 ft. of the 100 ft. of line provided. Now what else do I need air for?
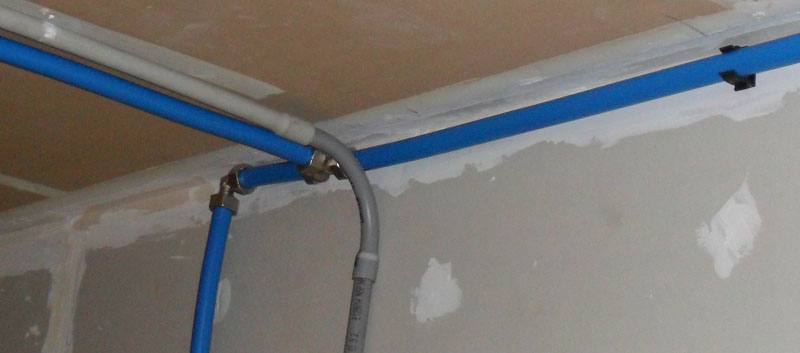
A view of the ceiling connections. Blue is the air line, gray my electrical. I used a spray of light soapy water at all connections to check for leaks. Only 1 leak at the 3/4" pipe connection as noted above. The O-rings and compression clamps all sealed no problem.
The company also has a kit with 1/2" (OD) line with push in connectors. About 1/2 the price if you are so inclined. Not so much trouble to unroll or connect. This is what I used after the tornado took the garage and all my airlines away.
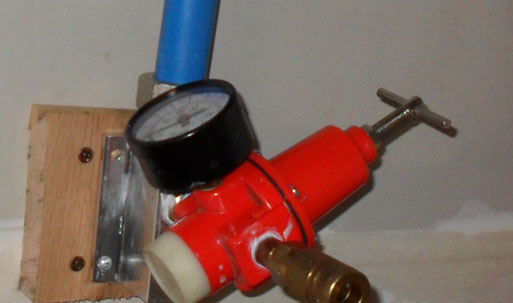
Initially I used a low cost pressure regulator, filter and oiler kit that was 1/2". (oiler wasn't used) It has 1/2" connections on in/out, but the out ID behind the 1/2" thread is almost a carbon copy of my 1/4" ones. With a 1/2" drill bit judiciously applied the filter is now 1/2" all thru. The other pieces are effectively 3/8". Looks like this has been going on for years on this brand. Ok if hooked up at the end of the line, were you plug your lines in, but maybe not if used in the front of the whole system. When you have a commercial work load, multiple tools running simultaneously, you may want to get pressure regulators and filters that have a high air rating or use a filter/regulator at each outlet.
After a few months I replaced the one in the picture with a high grade and flow rate Ingersol regulator and filter. No modifications needed.
![]()
Happy Motoring, VHubbard Jan 2012