For What Its Worth
Power Brake conversion and brackets fab
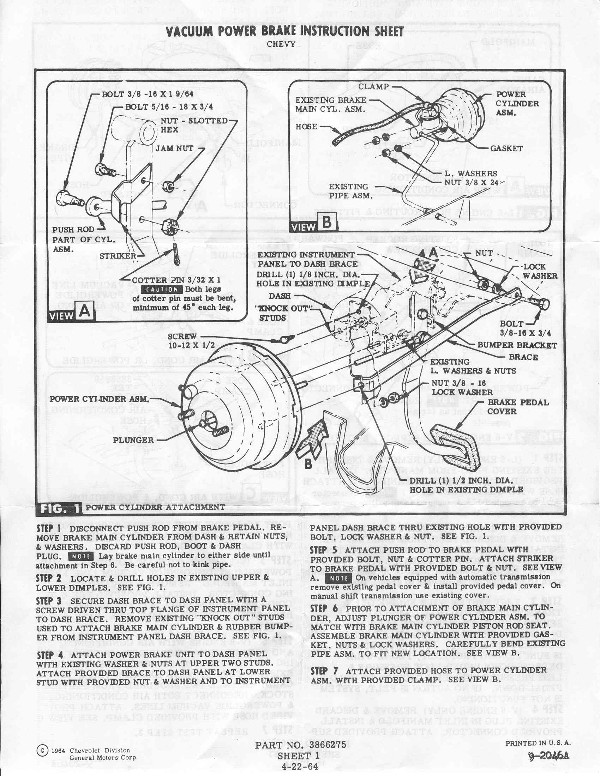
Mounting a power booster when what you had before is a "manual" brake system. I suggest you look at the Booster Page first then this page. This is for the stock style booster only. Hey this is your brakes, this is only what I did, you should make sure whatever you do is %100 reliable and strong- knock out studs that held the old master cylinder. A medium
hit with a 5 lb. short handle sledge does the trick usually.
The booster has its own studs.
- You usually need to undo the emergency brake cable also. To be able to get a socket on the upper nuts from the inside. To loosen the emergency brake cable you have to undo the nut where it connects to the dual cable under the car. You now get to play under dash contortionist to add nuts from the inside.
- Drill 3rd hole in the firewall. . The firewall may have a
dimple for where the hole goes. This is for the 3rd stud in the
booster.
- Brake rod now attaches to lower hole in brake arm. This
gives less force, but the booster adds much more There is the
same travel of the rod with less pedal travel with the rod in the lower
location.
- For my pedal I found a shoulder bolt to fit the brake rod (round
hole) and then tapped the pedal for the thread, followed by a
lock nut. Sorry forgot the sizes. Make sure it is a class 8
bolt if you do this. Don't want it breaking. Also do not bind the
brake rod!
- I don't think you need the brake pedal return spring now. The booster acts as a return spring.
- Fab a strong bracket to go from the 3rd bottom bolt to the
pedal/steering cross brace. This triangulates the system and
makes it strong. Without this bracket the brake pressure can
cause the firewall to flex and you don't want the mushy pedal, or years
down the road a crack in the firewall and possible brake failure. (See Below)
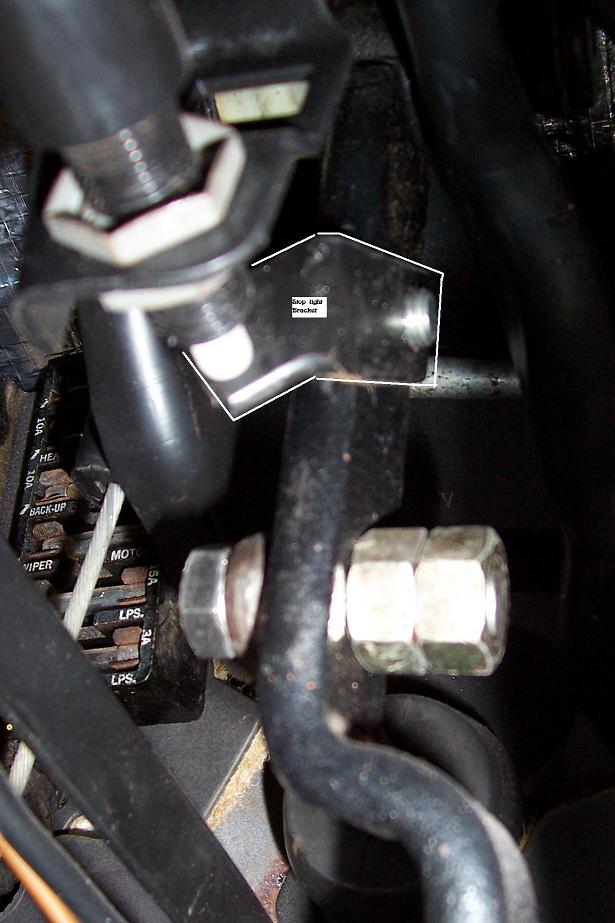
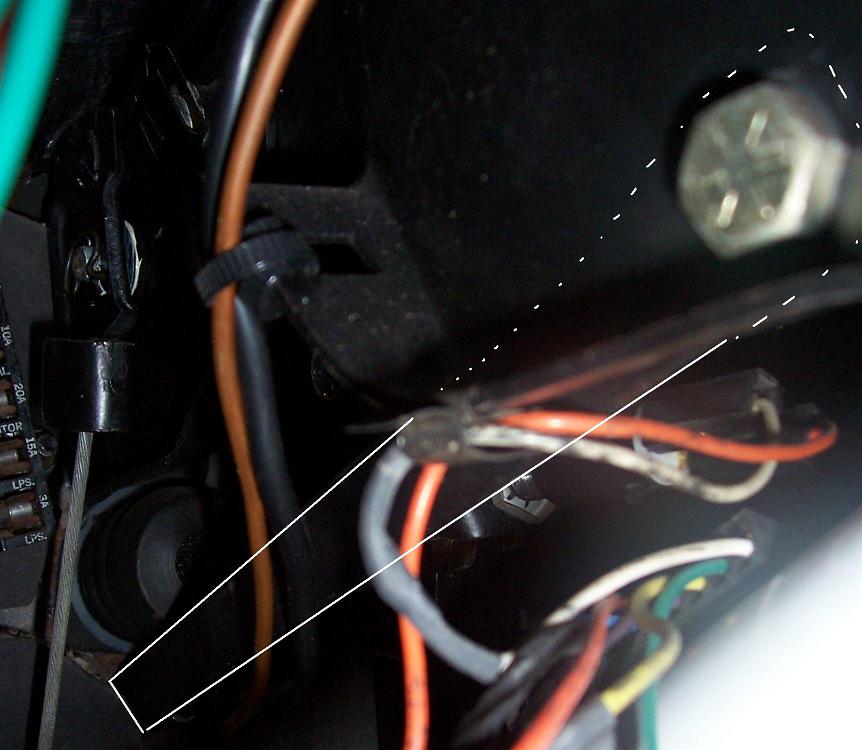
- Fab a bracket for the brake light switch. This bolts in the manual brake rod location. Your pedal does not come up as far now and the switch may not adjust far enough. (See Below)
- My installation manual says the top face of the brake pedal needs
to be 4" (100mm) +-1/8" (3mm) from the Toe Pan when in free state.
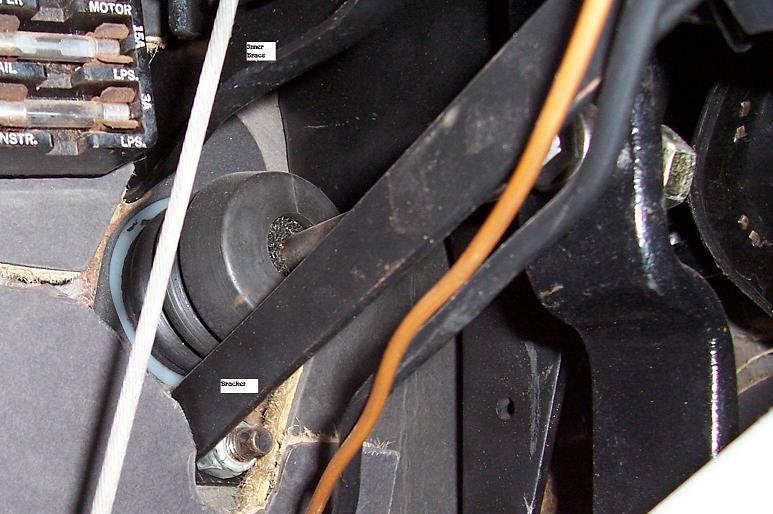
Brake Bracket
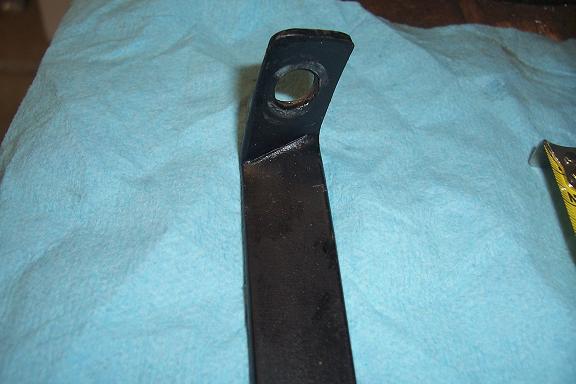
When converting to power brakes you must add a bracket from the bottom bolt that comes through the firewall to a hole in the main cross brace under the dash. This triangulates the booster and keeps the firewall from flexing to give you a solid brake peddle. I made this bracket piece out of some 1" x 1/8" flat iron, put 2 3/8 " holes in it and bent one end at the correct angle. This is needed since the center of the push bar is below the top 2 mounting bolts with power steering. This was not needed on manual brakes since the push bar center is in the center of the 2 mounting bolts. Pictures aren't great, but I think you get the idea.Making one out of cardboard first is best. Then use it as a guide to make the real one.
What I remember I did.
- Measure from the hole in the cross brace to the firewall where
the 3rd booster nut is. Cut your bar about 2" longer. About 14"
(355mm) on my Nova
- Drill a 3/8" (10mm) hole about 3/4-1" (19-25mm) from the end.
- Put the bar in a vice, with the hole end down in the vice. About 3/4" (19mm) past the top of the hole.
- The rod should be pointing straight up.
- Now tilt the rod to the Right about 20 degrees and tighten the vice.
- Bend
the rod down flat toward you. Use a hammer to get it
to bend flat or horizontal. This makes a 90 sort, but
"kicked out" on the end. Check for cracks at bend. If
cracked, start over. A very tight bend radius can cause a crack.
- Put in car on booster stud and up against the inside edge of the cross brace.
- Mark thru hole in cross brace where next hole goes. (12 1/2"
(318mm) from face or bend is where mine ended up.)
- Drill next 3/8" (10mm) hole.
- Debur, paint and install.
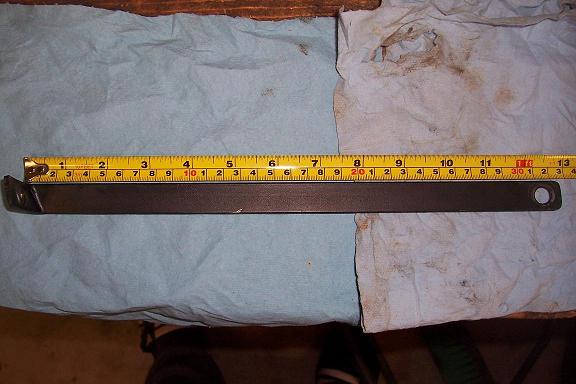
- Install brace, good washer lock nut and nut on the booster
stud. Then the top bolt assembly. It will make its own
slight twist as needed.
Brake Light Adapter
The throw on the power brake pedal is shorter. It starts closer to the floor with the stock style setup. A bracket is needed to engage the brake light switch. Again this is a simple fab of flat iron, 1 tapped hole and the correct bend. Similar to the stock one, but mine is much stronger. I didn't have anything thinner at the time.