For What Its Worth
New Console and Shift Indicator
in the 66
I wanted a console to cover the shifter, give
my leg someplace to rest on long trips and generally enhance the car.
Also a shift indicator since no one but me can figure out what gear the car
is in with the slap shifter. I decided to use the classic
bucket
seat console from Classic truck consoles. For a shift
Indicator I used the one from Dakota Digital.
I am using a B&M Quicksilver shifter. A slap shifter.
I have a 700r4 overdrive transmission. I have it setup for 4
speed. This shifter lifts up to get into Park, R or OverDrive
(Drive on 3 speed). Once in Overdrive it ratchets to nuetral or 3/D,2,1 To
get back to R, P You must be in Overdrive (Drive on a 3 speed) and pull up.
Mine came with switches for neutral safety switch and backup lights.
For the console setup these switches were removed.
Whenever
I go for oil changes etc, I have an Instruction sheet hanging on it showing
how to shift it. No matter what they say, most people can't figure out a
slap shifter.
Works great, but you need the indicator working. With the new
console the stock cover would not work. I decided to use a
Dakota Digital shift indicator that also does backup light and neutral
safety functions.
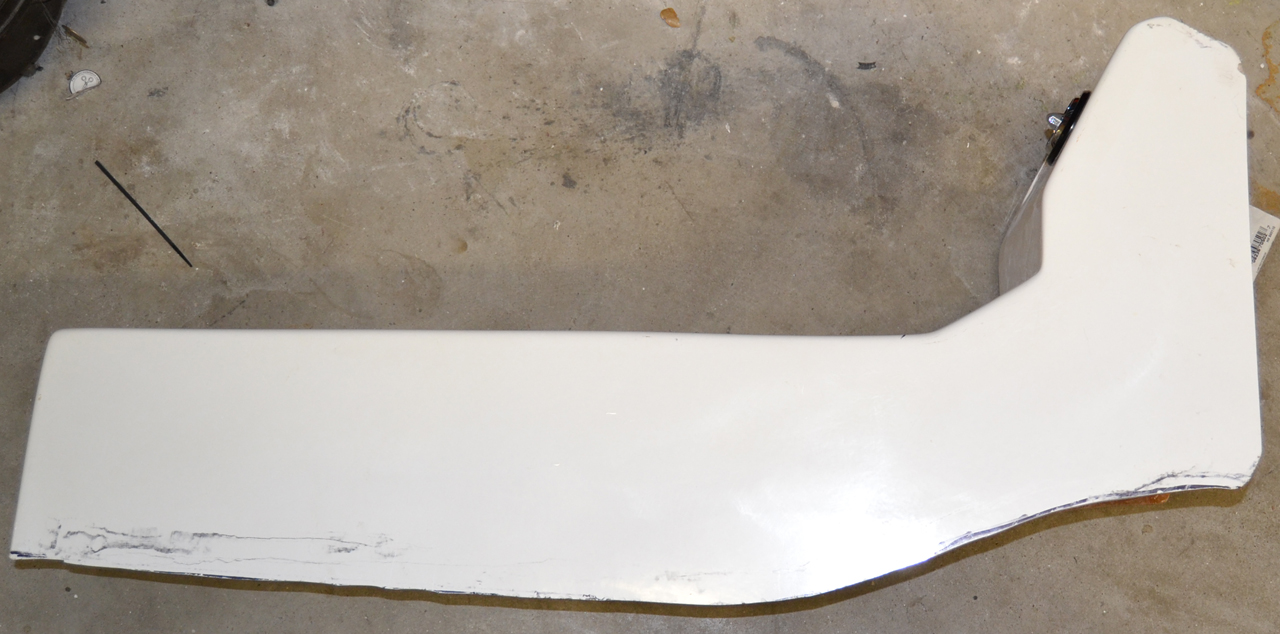
First I made a cardboard copy of the fiberglass console. I
then used it as a template to get the floor fit., location of the shifter
etc. It worked pretty well. It came close, still some trim work
had to be done to get it to follow the floor and clear as I wanted.
This is a picture of the side after initial fitting.
This is a fiberglass piece and I have heard of some shops that wont
work in fiberglass. It takes care. Wear a mask while
cutting and cleaning up the dust. Keep everything cleaned up.
It was cut, shop-vac, cut, shop-vac a lot for me. Cutting with a jig
saw and hole saw worked well, but you have to keep the tool at a low speed.
Just about 100 strokes a minute for the saw. Going fast can generate a
lot of heat and smoke with nasty stuff in it. It can melt your saw
blade.
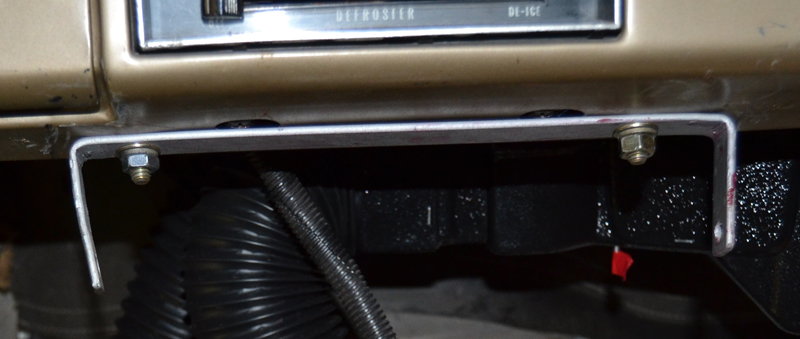
To hold the console it needs some mounting points. I put a
bracket on the dash and one on the hump for the back. The bracket
under the dash uses existing holes. The console was positioned and marked for the holes in front. You can
still reach into it from under the dash. Measured and made the
hole for the back.
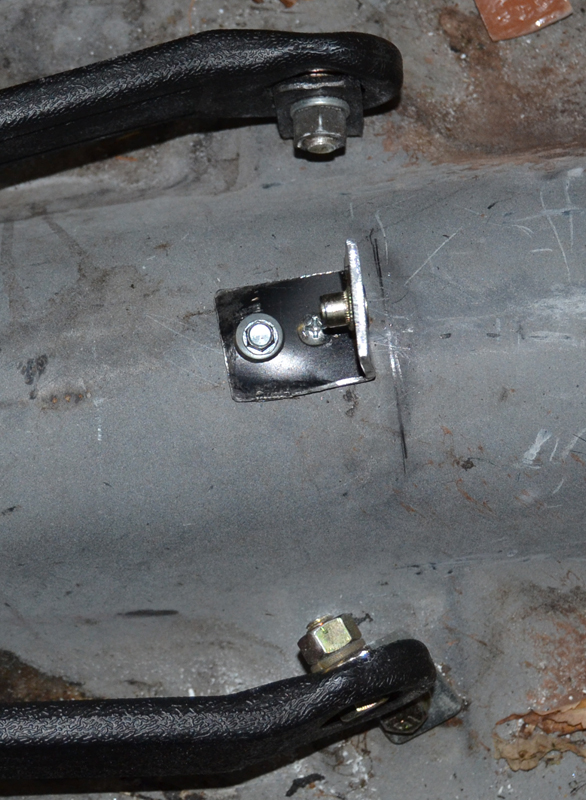
The Dakota Digital shift indicator is 3 basic pieces.
First a rotary resistor. Something to turn the shift position into an
electric signal the system can interpret. The instructions
said to mount it on the transmission. I had plenty of room under the
console inside, so I made some brackets and mounted it inside. Much
less chance of road damage. Some simple bending of the various pieces
provided with the system let me mount the connecting arm and rod to the
mecanical shift indicator mounting plate.

The other part is the electronics box and a relay for the starter switch.
The Starter Saftey switch is run via the relay and the backup lights are run
through the electronics box. I used an old license plate for
mounting it over the center hump. Cheap, available and easy to work.
The hardest part for me was getting all the wires clipped in. I have
big hands and the clips have very little tabs. When it was
all in it worked well.
The power to this system must be hot when the key is in start position, or
ignition. Also you don't want it hot all the time, only when the key
is on. These old cars usually don't have enough taps and Aux
power is disabled during starting. Everything but the ignition and lights
are turned off during starting. I already have an additional
aftermarket fuse box with relays. I used one of these fuse/relays powered via the ignition
circuit to insure it would maintain power during starting.

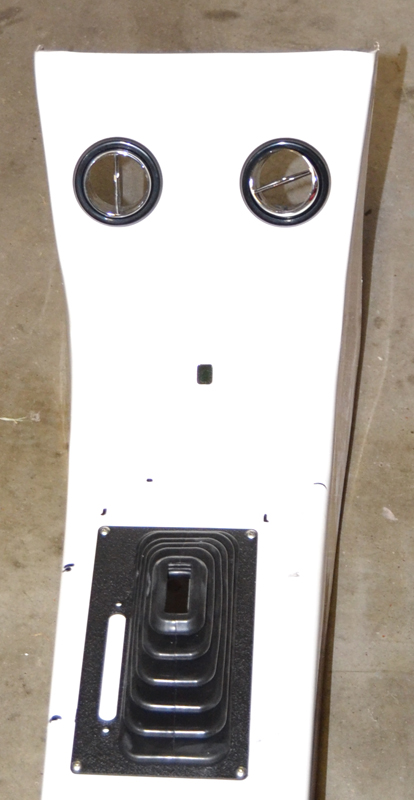
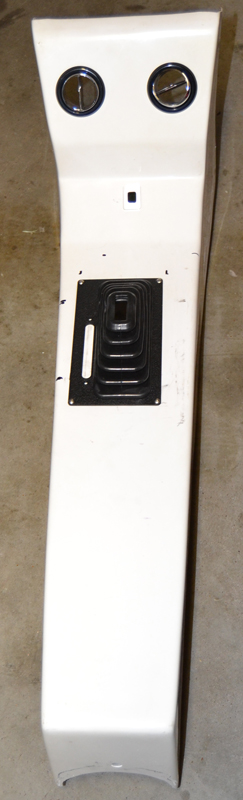
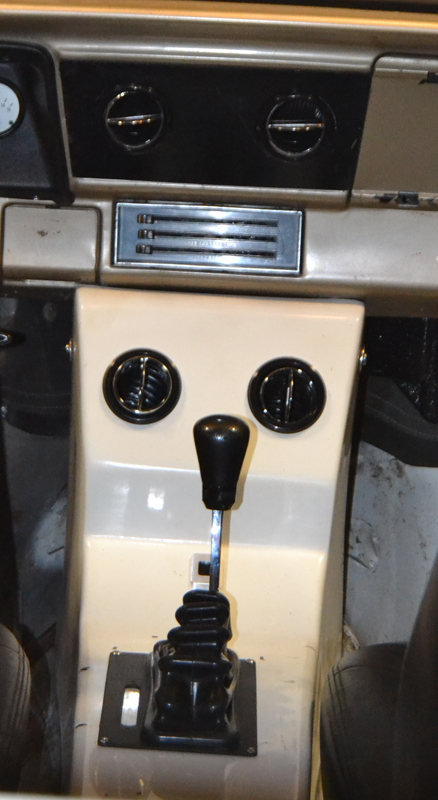
This picture shows the AC vents I put in the console, shift cover and
boot. As it happened I needed a large shift boot, 9" for my setup.
The shift indicator is in the middle, but the flash washed out the bezel of
the shift indicator.
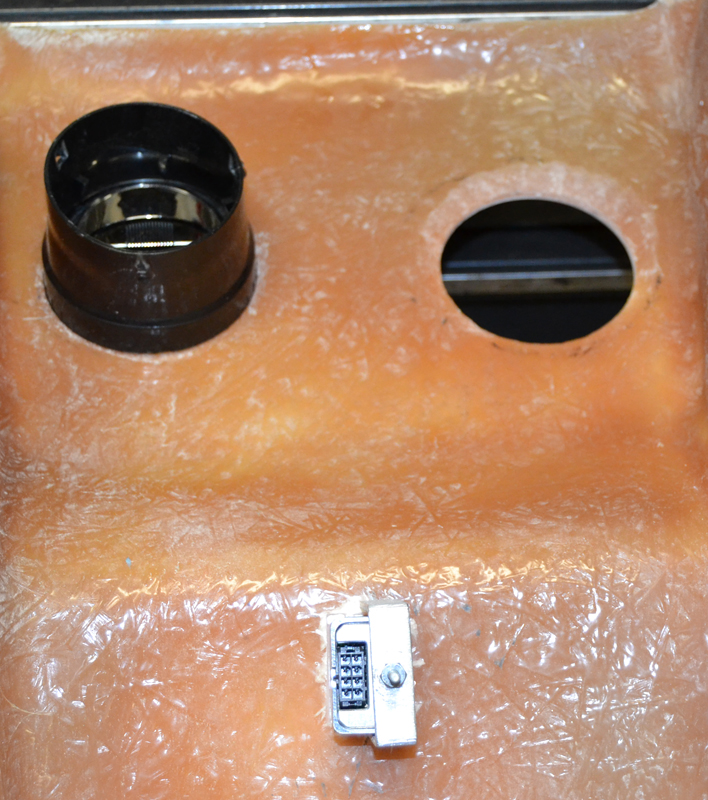
This shows the inside of the console. I had to grind down the
areas where the "nuts" for the AC vents went. They were designed for
metal, not the thick fiberglass. I didn't find any that were
designed for thicker material. The other option would be to press fit
them in on the OD. I did find the fiberglass varied in thickness
over 1/8" or 3mm. This added to the problem. This
also shows the mount for the shift indicator.
When I put the shift cover on the console, I needed to use screws with
blind holes. It is bolted on last in the installation.
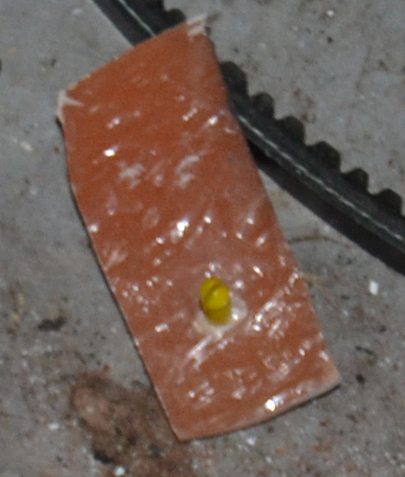
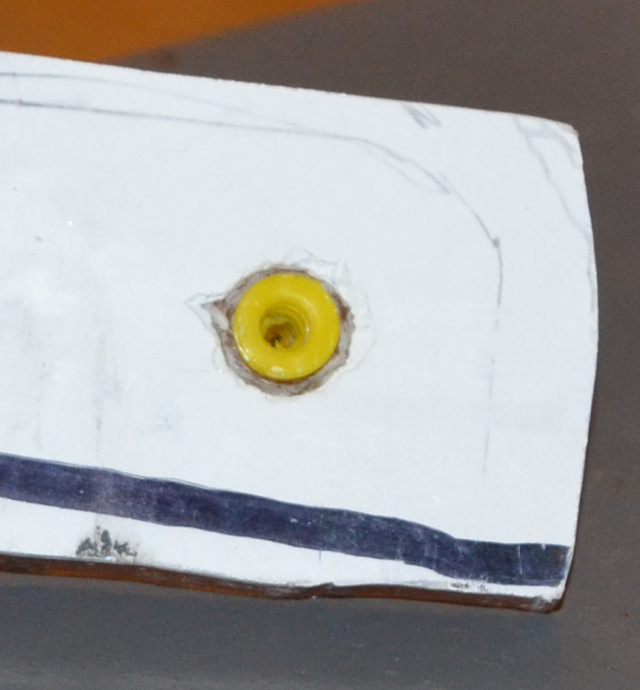
I used a test piece to drill the hole and csink the hole so the plastic
ferule would fit tight and flush. The test piece let me get the right
size drills before drilling the console itself. This pictures show the
plastic ferule in the test piece. It is a tight fit and expands more as the screw is tightened
keeping it set in the fiberglass. This will let me take the screws in
and out many times as needed. Worst case I just replace the plastic
ferule.
This is the console ready for installation, before being covered.
My wife is going to cover it in gray Naggahide. We will have to
keep it thin by the AC vents or it the vents wont tighten.
 Happy Motoring,
VHubbard. Sept 2013
Happy Motoring,
VHubbard. Sept 2013
Back to the 66' Nova page