
This was a 783 and tender, in the box and never run. Sitting for 20+
years. With the high stack, higher torque, engine along with the engines
weight it should pull well. First you have to get it to where it can pull
itself.
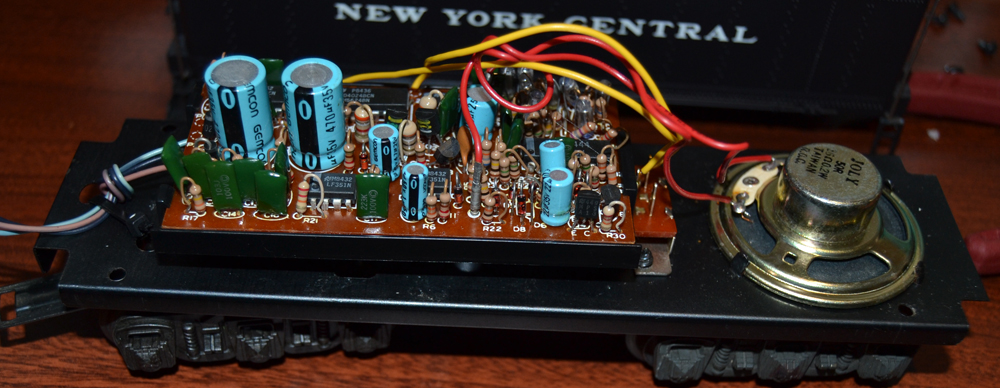
DO NOT RUN the tender until you have checked the board inside. The circuit board was held on with 2 layers of double back tape. Tender base, double back tape layer 1, aluminum sheet, double back tape layer 2 and then the circuit board. The original double back tape had rotted. It wasn't holding anything. If I had run the tender as it was the sound board could have shorted. The double back tape layers were replaced with new, high grade double back tape. It was work to clean off the old tape to save the aluminum sheet.
It was assembled as before with new double back tape. Including the wire from the speaker to the plate. When done the sound worked.
There is a black wire from the speaker to the aluminum sheet. Just bare wire end held against the sheet with the double back tape. I calculate it is for some capacitor type action.

The chug is "noise generator" type chug. The chug rate appears to be voltage related. The whistle is first gen. It works. The grand kids like the funny whistle sound.
There is another version of this setup using this board. It uses a plastic mount, no double back tape and no black wire from the speaker. It works similar.
Engine wiring for the tender.
The tender has a Brown, black and blue wire, middle wire.
The engine has a blue wire, and 2 black wires.
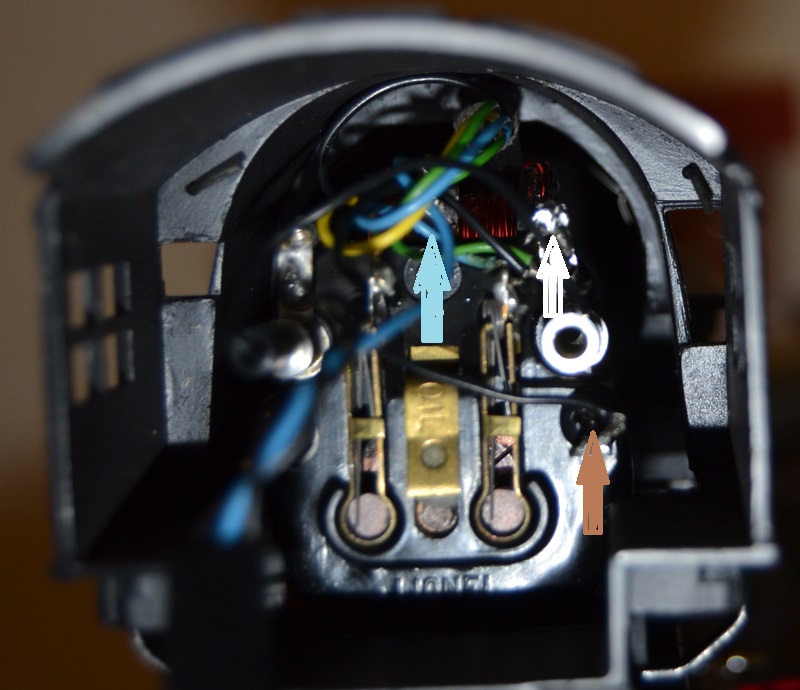
First out of the box, the engine wiring was poorly soldered, 2
wires hanging by a thread. That was fixed first.
When the engine ran, the motor made a lot of noise. The worm shaft
would push the motor shaft back into the brush plate. It was a high stack
from the factory, but only a single thrust bearing inside the
motor. The tolerance around the motor shaft and the bearing
seemed very loose. With the motor out of the engine and running by
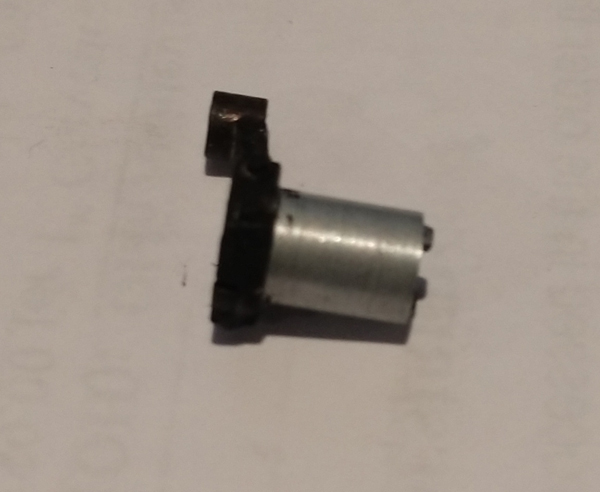
itself, the motor shaft rattled. A new 773-200x high stack motor as
it was labeled was installed. They come with single thrust bearing
or dual thrust bearing. The dual thrust bearing version was used,
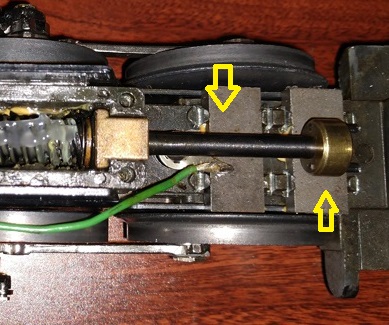
with thrust bearings inside and outside. This shows the thrust
bearing on the outside with the C clip holding the bearing and shaft in
place.

How much axial play should there have been in the worms shaft assembly, .010"/0.25mm. How much was there? .06"/1.5mm or so, it was obvious. Thin spacer washers (671M-23) were added until there was .010"/.25mm axial play. About 1 spacer washer thickness. The vertical distance was good, no binding in that direction when the 2 brass blocks were level with the top of the casting.

The worm shaft clearance where it connects to the motor with the rubber block was too tight. Various combinations of 2 motors and 2 worm shaft assemblies did not correct it. It was the same no matter the combination. There was a problem in the main casting with the distance from the motor mount to the gear box. This caused the shaft to push into the brush plate on the original motor. With the new motor, and the 2nd bearing preventing the motor shaft moving axially, it bound up. 20% was cut off the length of the rubber block and the pins were pushed into the blocks a little to get the right adjustment.

Once the clearance was adjusted, it ran well and much quieter. It has all new modern grease and correctly oiled.
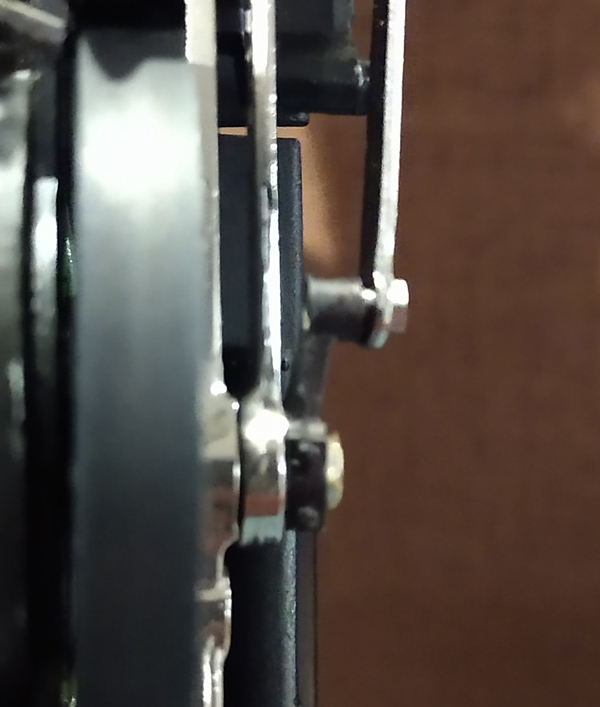
The gears and wheels were good. The linkage needed adjustment. The eccentric rod would catch/rub on the eccentric bolt head. The bolt head looks like it has the same clearance as the original 773. The eccentric standoff connection for the eccentric rod was a little shallow. Adjustments were made to make the eccentric rod clear the eccentric bolt head.

I found later that not all 773 eccentrics are made the same. See Stage 2 Below
The smoke rod needed a little adjustment so it wouldn't bind the linkage. A small bend in the linkage contact was all that was needed to make sure the linkage ran smooth.

Smoke Unit Fix, Version 2 3/2023
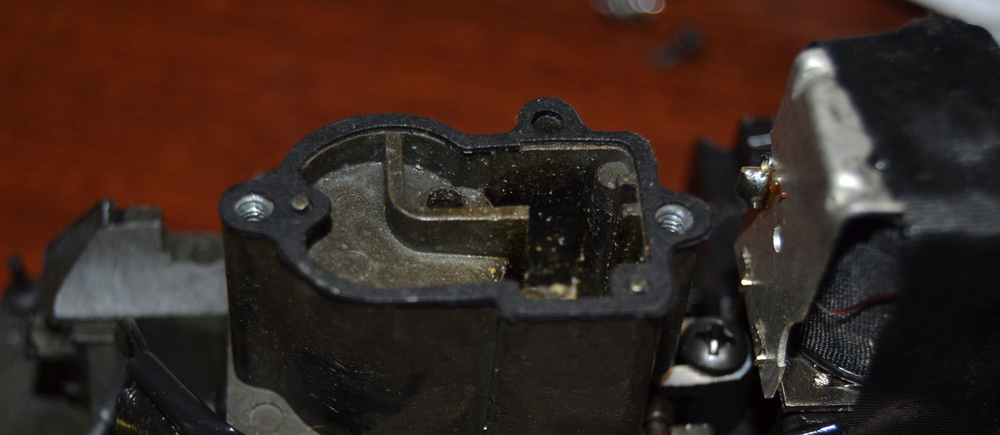
The smoke unit was weak or non-functioning. There is no packing in the smoke unit and no "wick" covering the resistor. This is what it looks like with the top off. In this case I was able to save the gasket. If the gasket is failed/broken. A thin layer of silicone gasket sealer can be used. This shows the bowl with the top off.
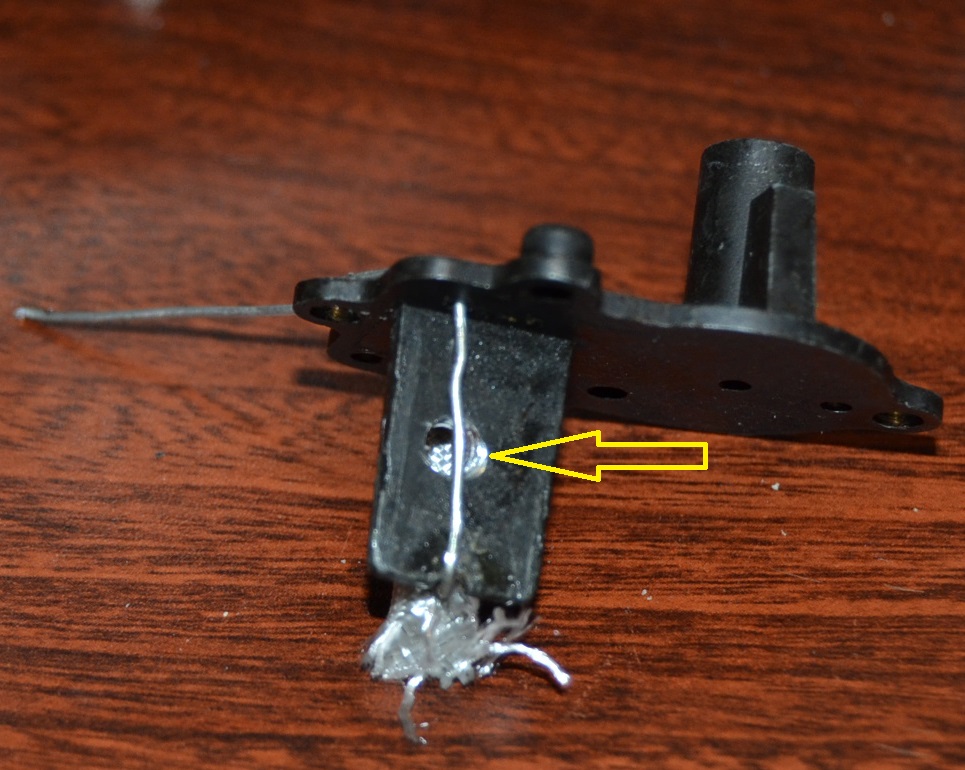
Jim Barret recommends drilling a 1/8" or 3mm hole in the wall of the smoke unit top. To allow more air flow over the resistor as the air pump works. Also assure there is a fiberglass wick, the same as the fiberglass wick used in postwar liquid smoke units. The yellow arrow shows the hole I drilled in the resistor mount wall in the middle. This is the top piece removed from the unit. This shows the "ground" side of the wire. The ground side wire is held down by the back, top hold down screw when the top is assembled.
This is the other side, with the fiber glass covering/wick added. This wick was split at the bottom a little so it could be pulled down and assure it would touch the bottom of the bowl. The bottom of the resistor should be about as far away from the wall as the top, to allow the air to pump around the wick. The hot wire goes through the insulated hole in the top.

In this case I used a postwar smoke resister. The wire can be bent in a U shape at the bottom with the proper spacing. Then a small dimple in the middle of the U to make it a W shape so it keeps the spacing after assembling the top. Now good, long smoke production. Steam chest and Smoke stack. It takes about 30 seconds to start working. I may in the future restrict the hole for the steam chest smoke so more will go out the stack. You still need to be careful you do not over-fill. If the resister is sitting in a pool of smoke fluid, it may not heat well enough. About 10 drops is what it needs.
One other problem is 2 of the magnets for magnetraction may be rubbing on the rear wheel. See the picture below. If one are both are rubbing, they need to be adjusted so they do not rub.
Stage 2
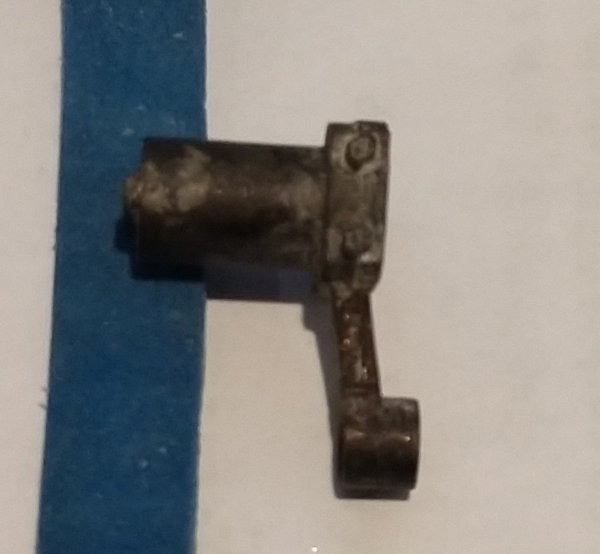
This is a picture of the original style eccentric for the 783. Notice how the arm is straight. Also notice the length of the steel sleeve.
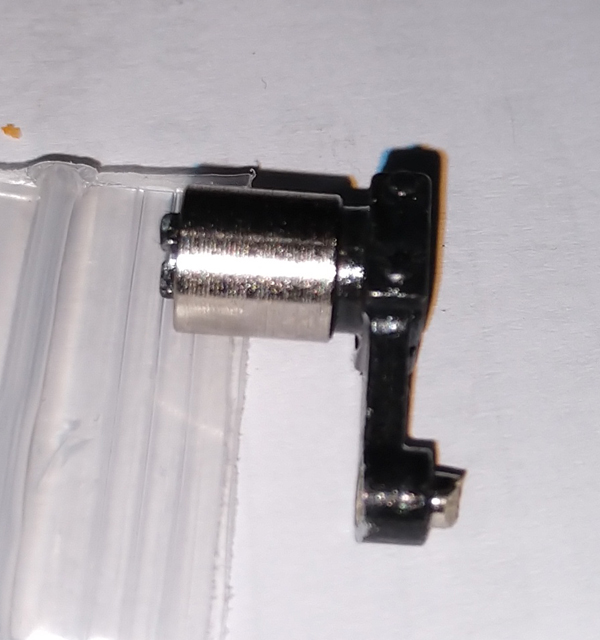
This is a picture of a 773 replacement eccentric, 700E-46. Notice the angle on the arm that will let the linkage clear the bolt head. This does not come with the steel metal sleeve.
You have to put the sleeve, 700E-151, on the eccentric. As with many hobby parts it does not fit out of the box.
First check the length of the sleeve. Make sure it will not cover up the nubs that engage the slots in the wheel. I had to file about .010"/.25mm off the length.
Heating the sleeve and pressing did not work, too tight. I had to carefully sand/file down the eccentric diameter until I could get the sleeve to press on. About .002-.004"/.05-.1mm on the diameter. DO NOT file/sand the nubs down by accident. 700E-241 is the eccentric with the sleeve assembled.
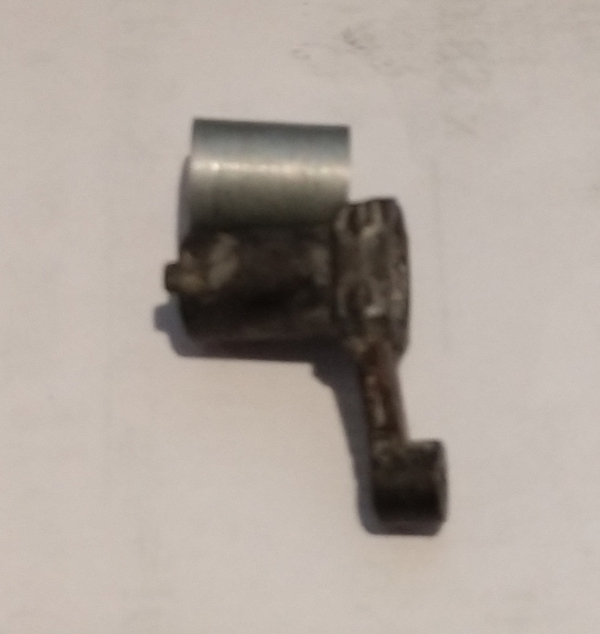
After fitting, assembly, cleaning and touch up paint. Notice how the sleeve fits to the top.
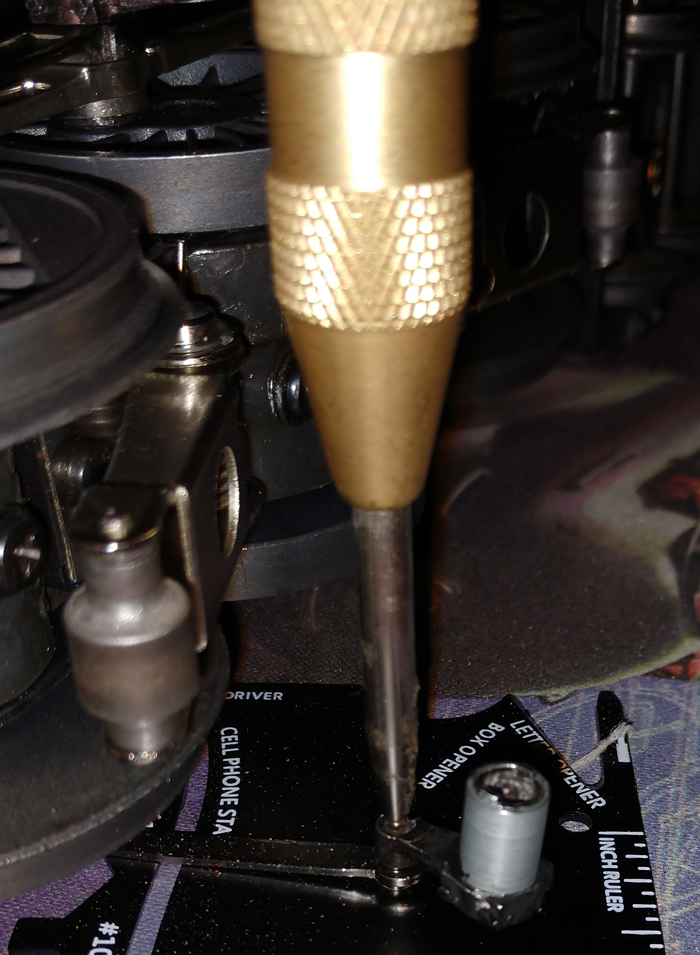
I put 2 of these newer eccentrics in. The original eccentric rivet pins that held the linkage were pressed into the eccentric. The new ones, 700E-53, I purchased were loose, a slip fit, but they had the hollow ends that expand to capture the rivet. This is what my 783 parts list called out.
I used my auto center punch tool to set the ends of the rivets. A few hits and the eccentric rivet was set. You need something hard backing up the head of the rivet or it wont set well. If you don't want the eccentric pin to spin at all a dab of epoxy glue on the back where you upset the rivet should do it.
Put them both in. The factory 783 eccentric bolts had some locking style adhesive on the threads. I put a little on the threads of the bolts when I re-assembled. A drop of oil for lubrication and running good. Everything clears without bending or tweaking anything.
Stage 3
Well it ran for 20 minutes and then another part failed. The drive pin on the center drive wheel. It just sheared off. No binding, no reason. Manufacturing defect or over stressed during assembly? Who knows. The bolt was NOT bottomed out. It also sheared off the drive dogs of my new "correct" eccentric when it failed. Ordered some more good eccentrics and a new drive center drive pin, 773-146. The 773-24 pins are for the end wheels.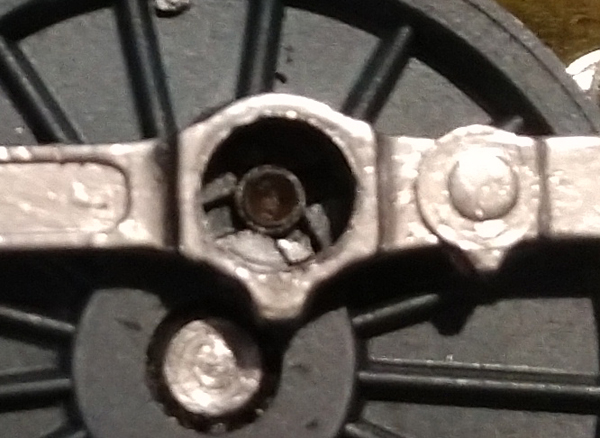
I pulled the wheel and found a small but strong knock out pin to drive the old pin out from the back of the wheel. Too big of a knock out pin may enlarge the hole making the wheel useless. Note the step on the hub of the back of the wheel. The wheel still looked good, and would press back on well. At least once more.
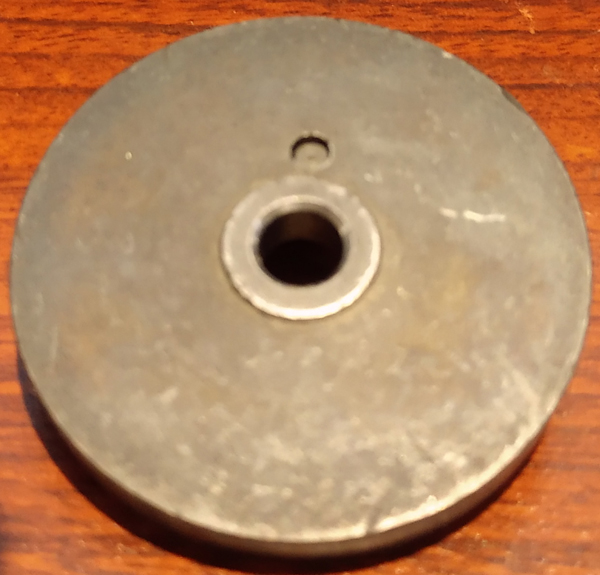
The new pin.
You must put a flat shim of some sort behind the wheel under the pin hole but not under the center hub. So the wheel is flat when you press in the new pin. If it goes in at an angle it could crack or break the pin or wheel. Using my press and 2 flat anvils and some shim material on the back of the wheel I was able to press in the new pin. It is strong and straight.
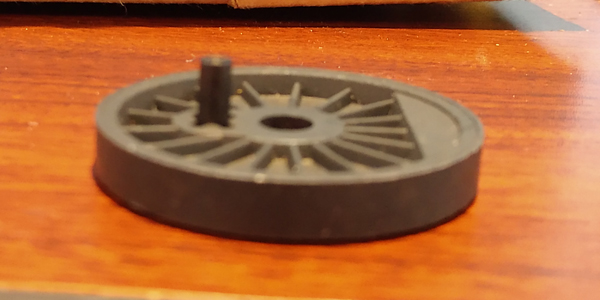
I pressed the wheel back on tight. There were grooves from the original assembly. I was able to index the wheel exactly as it was. Perfect alignment, everything works well.
Runs great, no binding and running smooth. Running for an hour, no problem. Hopefully the nemesis name can be forgotten.
The 783 now runs almost as good as an original 1950 773, but the engine is still noisier. It smokes well out of the stack and the steam chest. It does what it should have done out of the box. It doesn't run as fast as many engines, it has low gearing. Fast enough now to derail on 36" circle track at full speed from time to time, while pulling 5 cars.An original 1950 773, with a standard pullmor motor and proper lube, runs and pulls just as well as the 783. It runs nearly silently. No mechanical tune up was needed for the 1950 version. Precision, manufacturing to correct tolerances and proper fit makes a big difference.
Back to Main page.
Last Update Mar 22 2023