For What Its Worth
New Dash in the 66
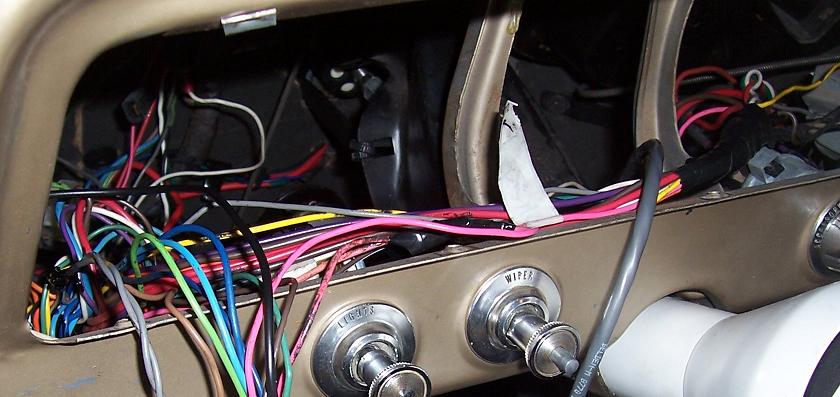
OK, the old dash in the Nova was good, but I wanted more leg room and an electronic speedometer. My wife bought me a VDO Gauge kit for my birthday. So I am going from this: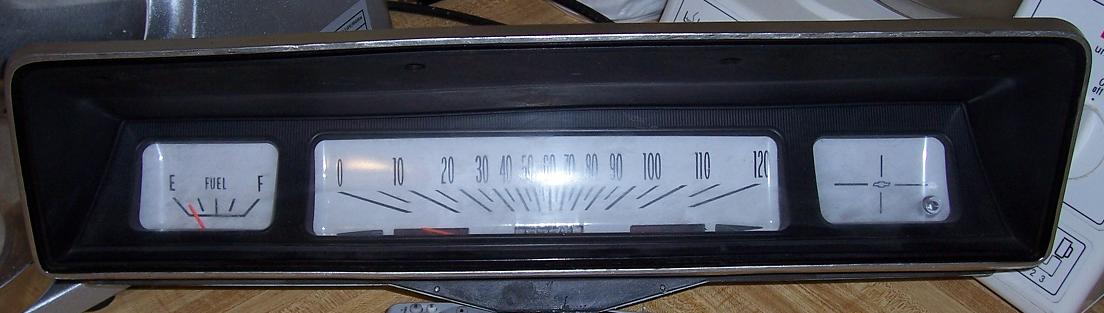
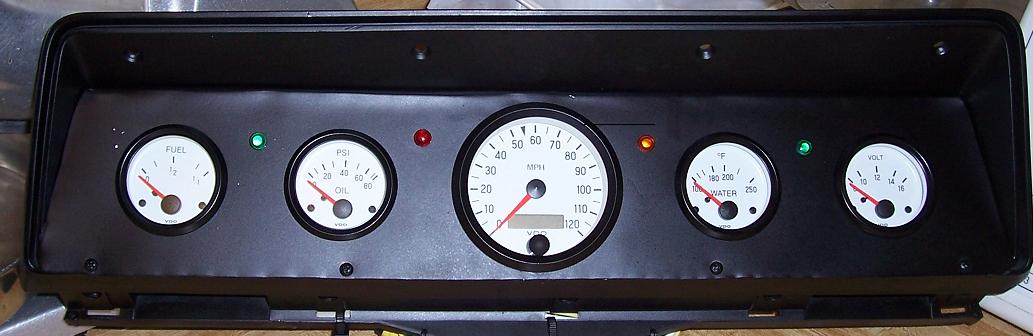
To this and removing the knee knocker gauges from under the dash. (Looks better in person, digital cameras pick up the smallest variances)
So How did I get there.
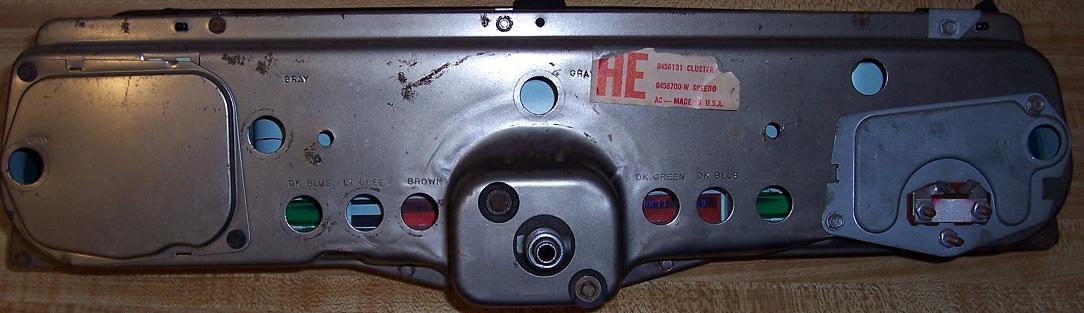
Take out the old dash and label all the wires. If you get messed up, the color code is on the back of the original dash. The gas gauge is the only L shaped 2 prong connector.
Replace the speedometer cable with the speedo sensing unit and run the wire to the dash. It basically follows the same path as the speedometer cable. A little easier to keep the new wire away from headers etc. than the old speedometer.
Then Plan a lot. And plan some more.
The original dash is 2 basic pieces. All you need is the front plastic piece. It has all the mounting holes. Then you fabricate a metal insert to hold the gauges. I started with an 18 x 6 aluminum plate from the hardware store. A lot easier said than done. If I had the money I would have bought one of the fancy "Blank" dash inserts and drilled the holes instead of making my own gauge mount. A little easier on the fabrication, but building and grinding is half the fun.
Warning, the Nova dash is not even. If it looks like the right side is taller than the left, that is because it is. By about a 1/4". Use a piece of cardboard to make your pattern with all the bends etc. Then cut out and bend the metal. Test the viewing angle in the car before making the plate attachment permanent. The big 3 1/8 inch speedometer is the main concern. It needs to be centered and you need to cut out part of the back of the dash piece for gauge clearance, top and bottom. Don't forget the clearance for the screw ring. I used a 2" and 3" hole saw to cut the holes. Then a Dremel tool to open them up a little to the right size.
I left a large flange on the metal faceplate insert to help re-enforce the area I had to cut out of the plastic.
Now the fun begins.
The lines for alternator, oil, gas and temp have a power line and a gauge line. In the 66 it is easy to recognize the power line since all the power lines are split off a main line and are pink. You need the other wire for the gauges. Keep 2 of the power lines to power the new dash later. You can use the oil and temp wires for the gauges. Replace the oil and temp senders with the gauge senders. See below for info on alternator wiring and the gas gauge sending unit.
The temp light wire is a little strange. The sender wire from the temp light went to the key switch and then the temp sender. This was for a "light check" when you turned the key to start it would ground the temp light. You don't want that with a gauge, so cut the two green wires from the key switch. The short one to the light you can toss, the other one is now a direct connection to the sender label and keep it.
I wanted LED turn, bright and alternator lights. You can find the 12-16v rated LED light packages at Radio Shack. 2 green, one red and one orange or blue. Make some holes for them also. Warning, LED connections are directional. + or - matters, unlike light bulbs. Radio Shack Part number is Red 276-270, Green 276-271, Orange 276-272 and They come packed in a holder & diffuser with color coded wires. About $2 each.
A note from Ron of PSC on Steves Nova Site on changing brightness on an LED. "Just change the value of the series resistor inline with the LED. Some of those blue ones are supper bright these days. If it has the resistor already built in, then just add a resistor in series with the positive lead. A 4.7K Ohm will dim it down about 60-70 percent. A 10K ohm will dim it down about 90%. Just go to radio Shack and buy this: http://www.radioshack.com/product/in...ductId=2062346"
The turn signals, brights and lights in the dash are all "power" wires with the bulbs grounding in the dash. Cut off the sockets and label these wires. You will need to wire them into the connectors for the dash later.
The illumination lights I left as regular light bulbs that came with the new gauges. Why? The dimmer. Waiting for the ones that work with a dimmer well.
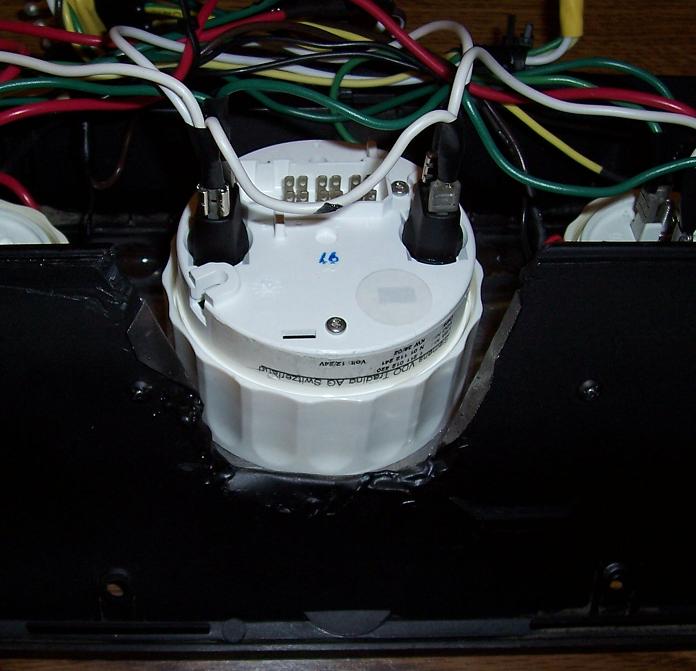
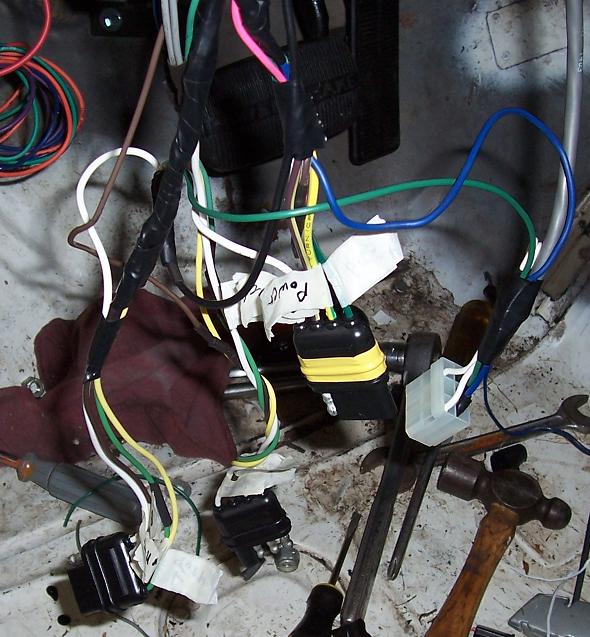
The Dash Wire Nest
Plan it out and follow the instructions. Use multiple colors of wires to keep from going nuts. And don't do the dash in the car. Do it in a nice comfortable room. If your selection of metal connectors is old and gray colored from corrosion, get new ones. Those old ones won't solder well. After looking for nifty connectors for plugging the dash in the car, I decided on the 4 wire trailer connector. Why? cheap, plentiful and I didn't need to buy new high dollar crimping tools. It took 3 of them along with the speedometer connector. This includes 2 power and 2 grounds. Put colored tape on one connector set, and reverse male-female side of one of the others and it is pretty hard to mess them up when you need to plug them in later. I plugged in both ends of the connectors and labeled each wire on the car side of the connectors when doing the dash wiring. When it came time to attach the connectors to the car, I unplugged them from the dash and had the plugs already labeled for wiring them in. Wire ties used to tie the connectors close to the dash to keep them from flopping around and yanking on the wires.
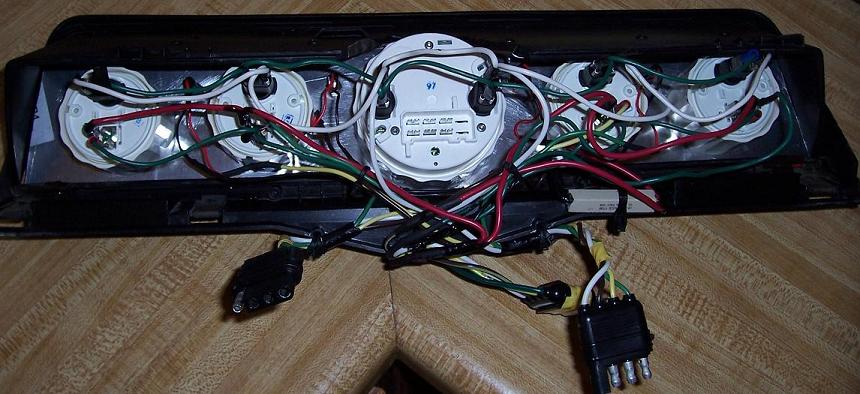
16 more connections in the car for the dash connectors and you are done! Don't forget ground and power connections. I screwed the ground wire into the body since I didn't like the stock method. About 76 connections total crimped, soldered, shrink wrapped and taped as needed. A little bulb grease on the connectors and they go together easy. You can also use "liquid tape" where needed or in those hard to reach areas. It's OK, but takes about 3 coats to suit me.
A little more cleanup in the dash will be needed after you un-taped it to find the wires you needed. (Before cleanup picture) You need to make sure the wires don't rub on something and wear through. They also need to be off of the various switches in the dash. The bundle used to be pinned to the back of the stock gauge cluster. Cleanup is fairly easy since now we have neat plastic wire covers and zip ties, The didn't have them in the 60s, I know, I was there.
Did it work, yup all of it the first time. YEEEHAAW Now for the road test and speedometer calibration.
The oil sender
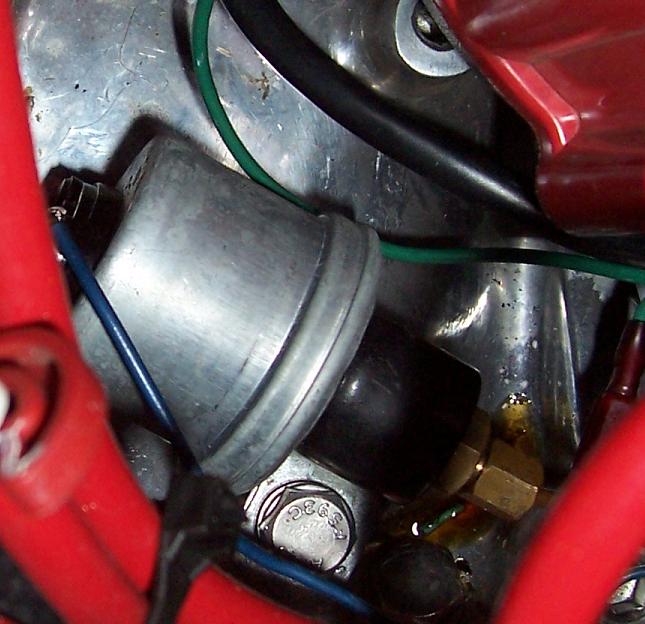
On the small block Chevy getting to the sender can be a hassle. I could not get a wrench on the manual line adapter. It had been put on before installing the engine.. The intake interfered with a socket. The solution was to use a short copper line with the proper adapters and move the sender to one of the free mounts on the intake. I just happened to have the correct adapter to connect the copper line to the sender. I have been collecting left over fittings for 30 years. Whenever I find out what it was called, I will add it. Don't use Teflon tape on pipe fittings for gauges, you need a good ground. Teflon paste works to lube the threads and doesn't interfere with the ground. Most of the copper lines for gauges use a "crimp" ring and nut. I solder the crimp ring on the line. No chance of it shaking loose and leaking.
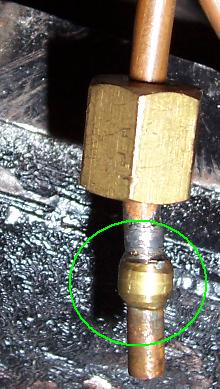
Use a multimeter to assure the gauge has a good ground. Here is a picture of my sender installed before I got the little bitty leak fixed.
Alternator light conversion to an LED link.
Gas Gauge sending unit.
The gas gauge must have a sending unit that matches the ohm rating of the gauge. The stock one is 90 ohms on a 66. This new unit is 180 ohms. They recommend cutting a new hole in the gas tank and using the sending unit they provide. Fairly easy on a nice new fuel cell. On a stock tank without many flat areas on top not as easy. Especially when it is mounted against the floor of the trunk.
I could not find a good way to mount the new sender to the old pickup and still be able to get it back into the tank through the stock location. Time to choose. Get another Gas Gauge to match the sending unit or pull the tank and get it modified to accept the new sender. I think I am getting a gauge until I figure a way to make my matching gauge work. Before buying your gauge set, make sure the gas gauge can work in your car without tearing up the tank. My set just happened to be 1 of 2 styles that did not have a 90 ohm gauge option. All the others from VDO did have the gauge option.